Table of Contents
A Secret Ingredient I Discovered as a Boy

I must have been around 13 or 14 years old. I was in the kitchen. My mother and I were talking, and I forgot about what. But then she pointed up to a cabinet.
“Khalid. Get me the hamed mraqed.”
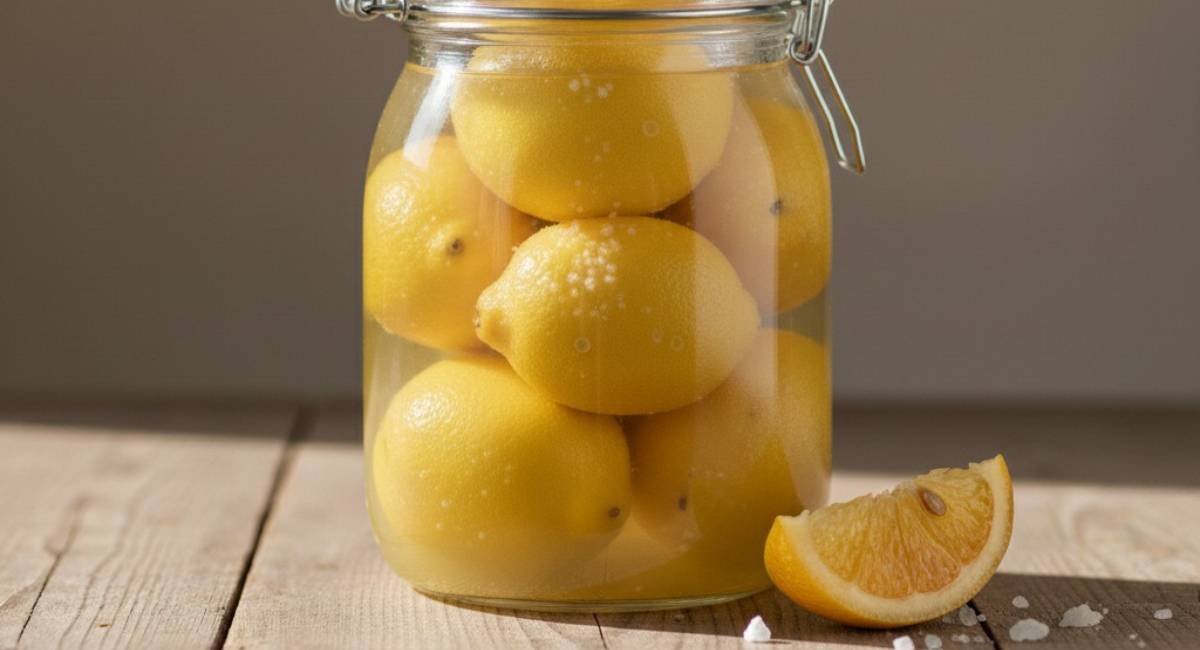
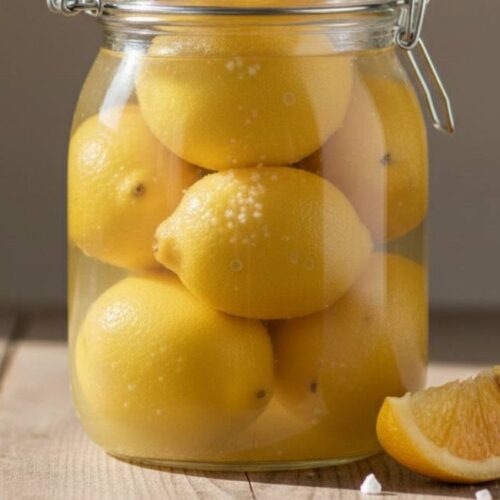
I climbed up and pulled down this huge glass jar. Heavy. It was full of these golden lemons, floating in a cloudy juice. I’d never paid it any attention before. “What is this stuff?” I asked her.
She got that smile and said:
“Ah, Khalid. That is the secret. A secret to our Moroccan kitchen. Every mother has a jar like this. It adds a taste you just can’t get any other way.”
I didn’t know I would become a taxi driver then. Didn’t know I’d spend my life on the road, tasting all the foods of Morocco. But she was right. That jar was a real secret. And now, I’m giving it to you.
A Little Bit of History: Lemons in Morocco

The Lemon’s Long Road to Morocco
The lemon wasn’t born in Morocco. Like me, it was a traveler. It came from Asia, a long, long time ago. But when it got to North Africa, it found its home. The sun, the earth… It was the perfect place. So the lemon became Moroccan. It got into our souls.
You find it everywhere here. In our tagines. In our salads. Even in our mint tea sometimes. It’s that bright, fresh taste. The flavor that cuts through the rich spices and wakes up your mouth.
Why We Had to Preserve: The Wisdom of Our Mothers
My mother didn’t have a big refrigerator. Most people didn’t. You had to be smart with your food. Lemons don’t grow all year. So, when the trees were heavy with fruit, the women would get to work. They were preparing for the months to come.
Preserving lemons wasn’t a fancy hobby. It was about survival. It was just wisdom. That huge glass jar in her kitchen? It was a promise. A promise that we would have that essential, tangy flavor for our tagines all year long. This is how one of the best secret ingredients of our Moroccan cuisine was born.
What Are Preserved Lemons?
More Than Just Pickled Lemons
So, what are we making here? Some people say “pickled lemons.” To me, it’s not the right word. A pickled cucumber is sharp; it bites you with vinegar. This is different. This is deeper.
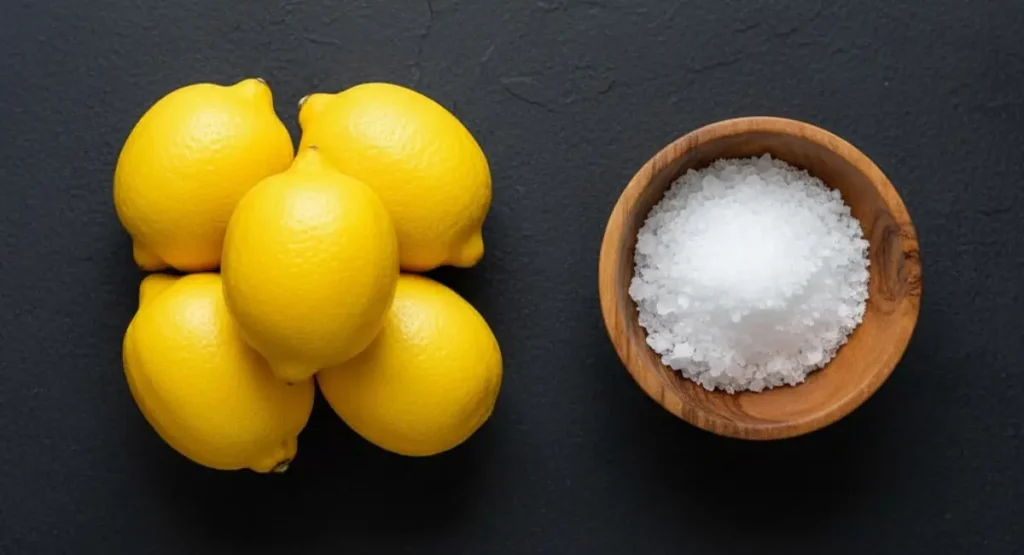
We use only two things for this. Lemons and salt. The salt and the juice from the lemons do all the work themselves. It’s a cure. A slow transformation.
The Magic of Salt and Time
Honestly, the magic ingredient here is time. You put the lemons in the jar, and you walk away. For a month. What happens in that jar is the real secret.
The lemon stops being angry and sour. It calms down. The white part of the peel, the bitter part, it just gives up. The whole thing becomes soft, tender. It’s a process you have to respect.
A Unique Umami and Tangy Flavor
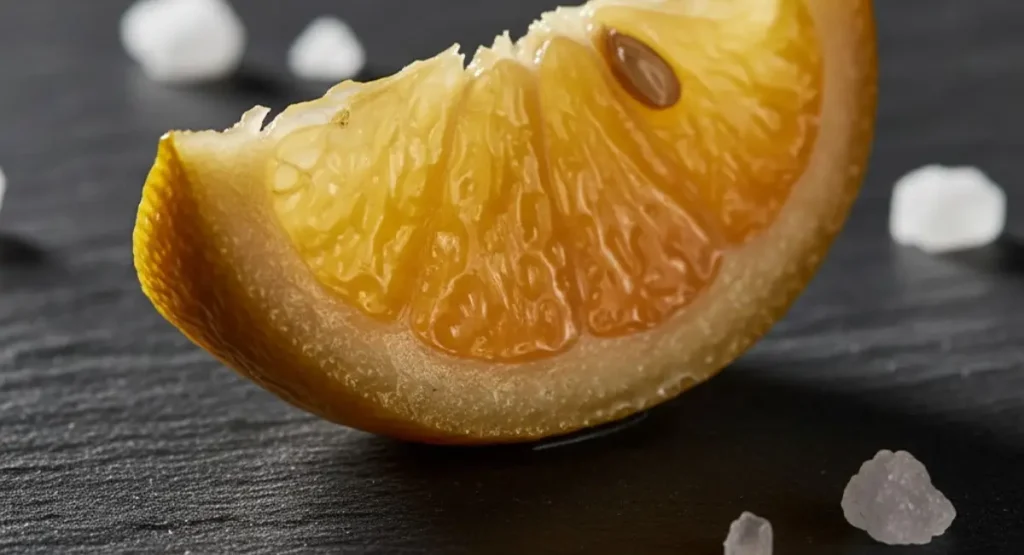
How does it taste? It’s a punch of pure lemon, but not the sour kind. It’s salty, of course. But there’s something else… a savory, tangy flavor that’s hard to describe. I hear they call it umami
I call it the flavor of home. It’s what makes a simple chicken tagine taste like the real deal. You can’t get this flavor from a bottle.
The Only Two Ingredients You Need
The Best Lemons for Preserving (Meyer vs. Eureka)
Let’s talk lemons. The best kind for this job is Meyer lemons. Thin skin. Sweeter taste. They get soft and delicious. They’re perfect.
Can’t find them? Regular Eureka lemons are fine. Just get the small ones. And make sure they are organic. You’re going to eat the peel. It has to be clean.
The Right Kind of Salt (And What to Avoid)
Now, salt. This is important. You need coarse salt. Kosher salt. Or a good sea salt.
One rule. The most important rule. Do not use table salt. The stuff with iodine. It will ruin the flavor. It will mess up the cure. Just don’t.
Choosing Your Equipment: The Jar is Important
Why Glass is the Only Choice
Let’s talk about the jar. It has to be glass. No plastic containers. Ever. Why? Because lemons are full of acid. That acid will attack plastic over time. You don’t want to eat that.
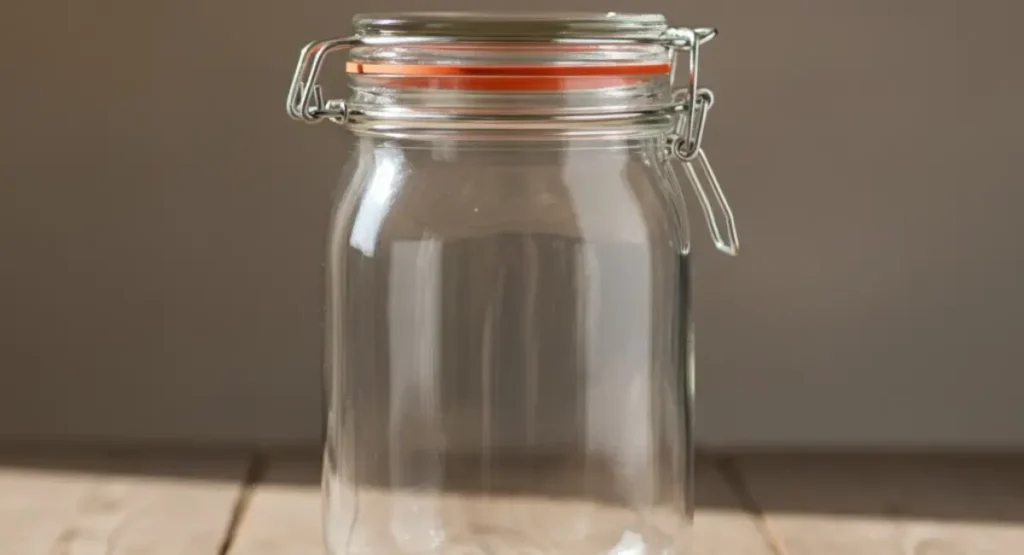
A simple glass jar is the only tool for this job. It’s clean. It’s safe. It’s the way it’s always been done.
The Lid Matters More Than You Think
The lid is just as important as the jar. It needs to be airtight. We have to keep the air out. But watch out for plain metal lids. The salt and acid will make them rust.
The best lids are glass with a rubber seal, like on the old canning jars. If your lid is metal, here’s a simple trick. Put a small piece of plastic wrap on top of the jar before you screw on the lid. It protects the metal.
Size and Shape: Pack It Tight
What size jar do you need? A simple rule: just big enough. You want that jar to be packed full when you’re done. No empty space at the top.
You have to squeeze those lemons in. Pack them tight. If there’s too much room, the lemons will float. And if they float, they touch the air. Air is the enemy of preserved lemons. They need to be snug, like passengers in a full taxi.
How to Make Preserved Lemons (Step-by-Step)
Step 1: Sterilize Your Jar
First, the jar. It must be perfectly clean. This was my mother’s number one rule. Wash it well with hot soap and water. Then, put it in a hot oven (350°F / 175°C) for 20 minutes while it’s still wet. This is how you kill any bad stuff. Don’t skip this.
Step 2: Wash and Cut the Lemons
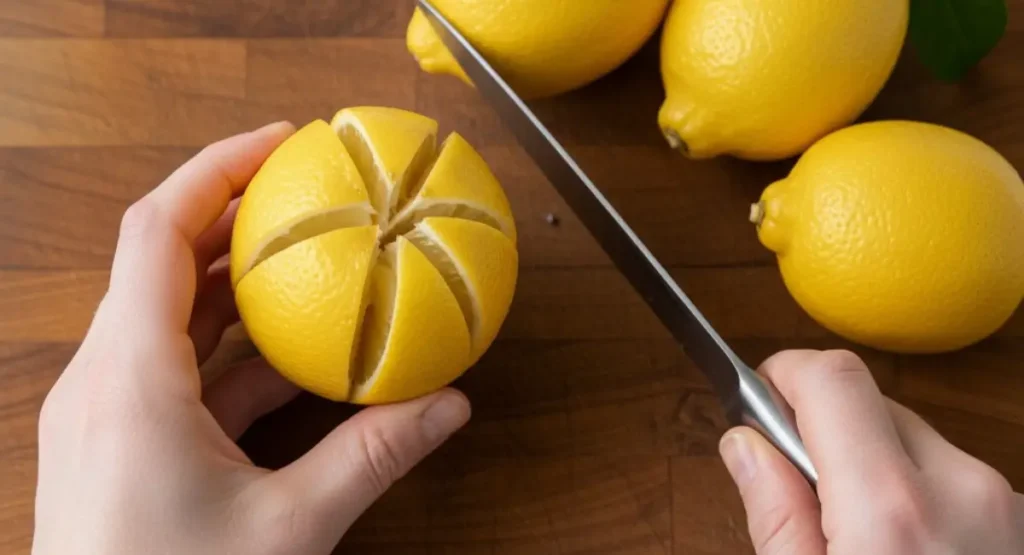
While the jar is heating up, work on the lemons. Scrub them. Remember, we eat the peel. Now, the cut. It’s the traditional way. Slice it down the middle, but not all the way. Leave the bottom connected. Turn it, slice it again. It should open up like a flower. See? Simple.
Step 3: Salt the Lemons Generously
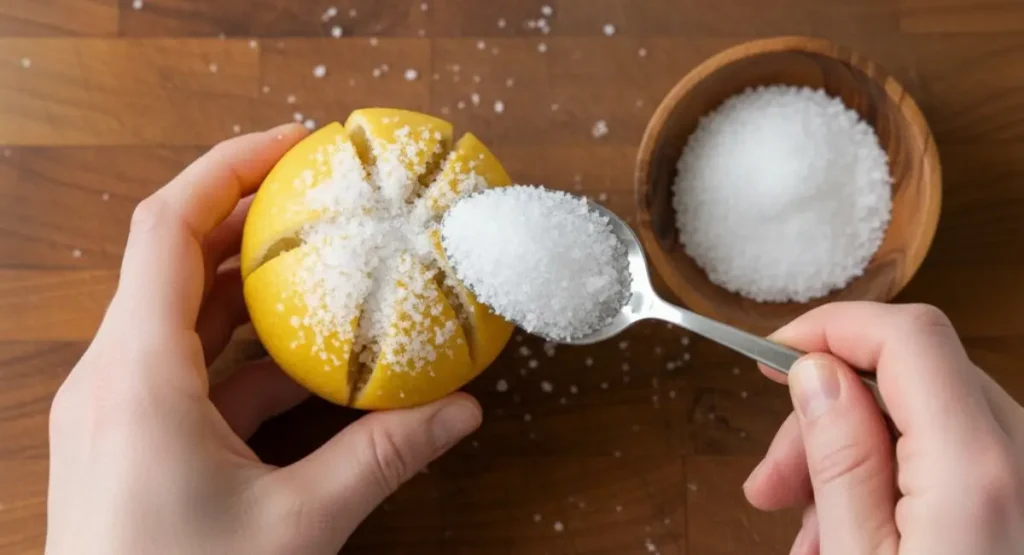
Salt time. Grab a lemon. Pry it open. Take a good spoonful of coarse salt and stuff it inside. Be generous. Get it in there deep. Then squeeze it shut. Do that for all of them.
Step 4: Pack the Jar Tightly
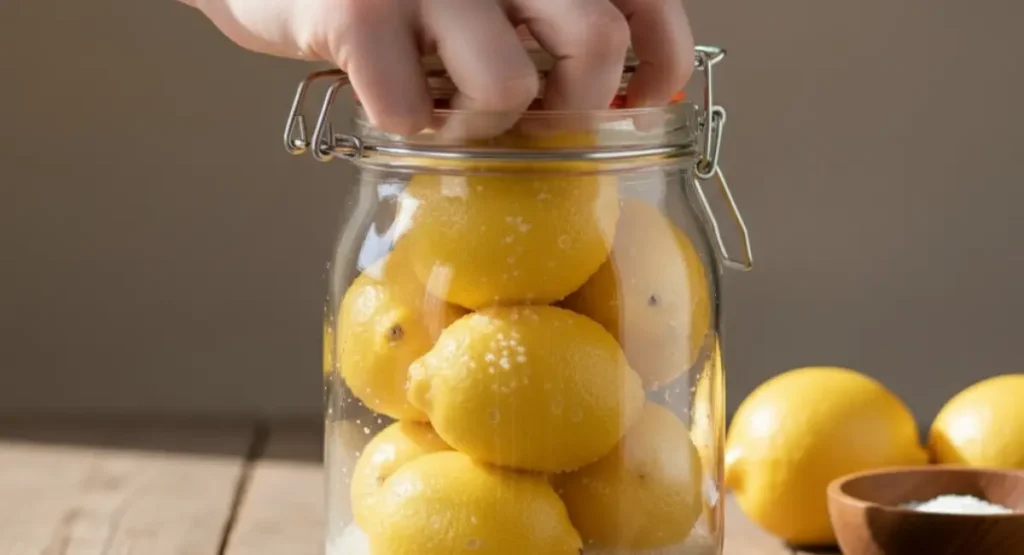
Jar’s cool? Good. Now pack it. Push those salted lemons in. You have to be rough. Squeeze them tight. You want to see the juice start to come out. Throw a little more salt between them as you go.
Step 5: The Waiting Game (Curing for 3-4 Weeks)
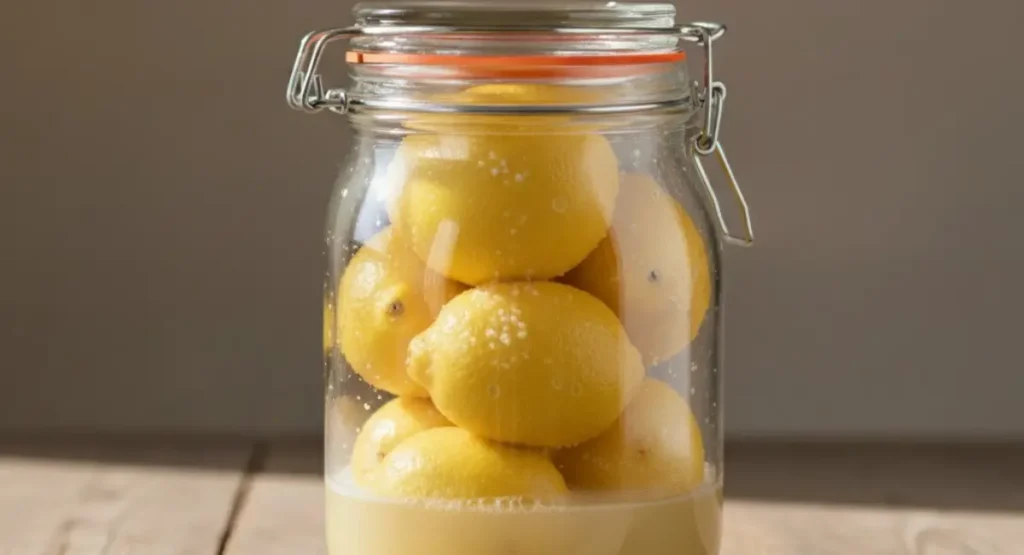
Seal the jar. Tight. Find a dark spot for it. A cabinet, a pantry. Now comes the hard part: waiting.
You have to check it once. After 3 days. Look inside. Are the lemons swimming in juice? If not, you have to add more. Squeeze a fresh lemon and top it off. They must be completely covered. Then, put it away. For a month. Don’t touch it. Patience is the secret ingredient.
Khalid’s Rules of the Road (Common Mistakes to Avoid)
Rule #1: Don’t Use the Wrong Salt
I’m saying this again. It’s that important. Regular table salt with iodine will ruin your lemons. I’ve seen it happen. The taste is just… wrong. Chemical. Get a box of kosher salt. It’s the right tool. End of story.
Rule #2: Make Sure the Lemons Stay Submerged
Air is your enemy. Any piece of lemon that touches the air can grow mold. This is why you pack the jar tight. This is why you check it after 3 days. If a lemon is floating, push it down. Or add more juice. They must stay under the water. No exceptions.
Rule #3: Don’t Be Afraid of the Cloudy Brine
After a week, you’ll look at the jar. You’ll think it’s gone bad. The juice will be cloudy. It might look a little thick. This is normal. In fact, it’s a good sign. It means the magic is working. It’s supposed to look like that.
Rule #4: What if I See White Stuff on Top? (Kahm Yeast)
Sometimes, you’ll see a white film on top. This is not mold. People panic and throw everything out. Don’t do that. It’s a harmless thing called Kahm yeast. It happens with fermentation. Just scoop it off with a clean spoon. Your lemons are fine.
Rule #5: My Lemons are Still Hard After a Month. Why?
So you waited a month, and the peels are still tough? It can happen. Two reasons, usually. Maybe your lemons had very thick skin. They just need more time. Give them another month. Or maybe you didn’t use enough salt. Salt is what makes the peel soft.
Rule #6: Can I Speed Up the Process?
Waiting a month is hard, I know. Everyone wants a shortcut. But for this? There are no shortcuts. Real preserved lemons need time. The flavor needs that slow cure. The “quick” recipes are not the same thing. Not even close. You have to respect the journey.
How to Use Your Preserved Lemons
Rinsing and Preparing the Lemons (Peel vs. Pulp)
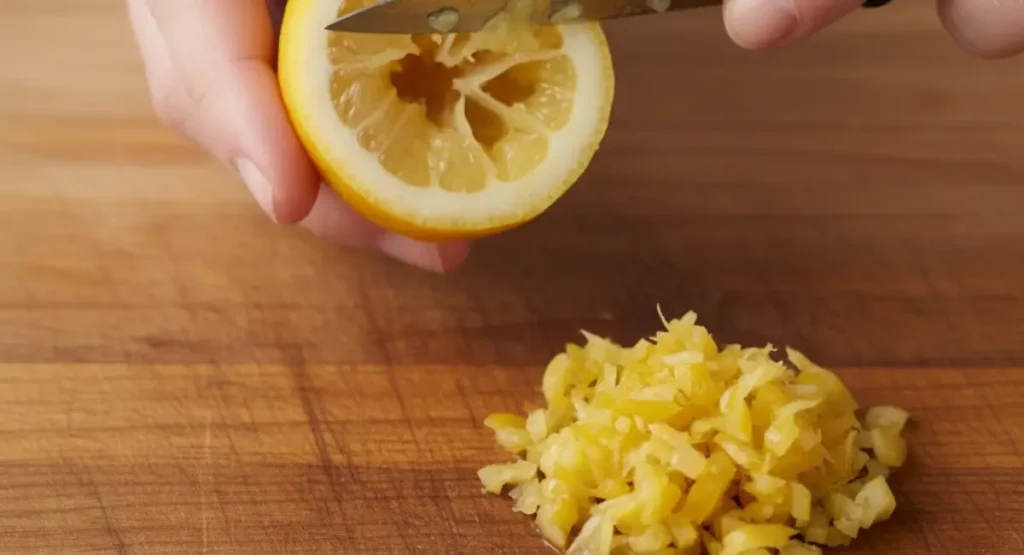
So your lemons are finally ready. The hard part is over. Now for the fun part. Take a lemon out of the jar and give it a good rinse under cold water. This gets rid of the extra salt on the outside.
Now, you have two parts: the peel (or rind) and the pulp inside. For most cooking, the peel is the real prize. It has that amazing, concentrated lemon flavor without the sharp acidity. Just open the lemon and use a small spoon to scrape out the mushy pulp. Most of the time, I just throw the pulp away. But if you like things very salty, you can mash a tiny bit of it into a stew. Once you have the peel, chop it up fine. It’s ready.
Here are my favorite ways to use it:
- In Tagines and Stews: This is the most classic way to use them. It’s the secret to so many of our best Moroccan dishes. Try adding the finely chopped peel of half a preserved lemon to your next chicken tagine with olives during the last 15 minutes of cooking. It adds a bright, tangy flavor that cuts right through the richness of the sauce. It’s also incredible in a slow-cooked lamb or beef tagine.
- In Salads and Dressings: This is my favorite trick. It will change your salads forever. Forget boring lemon juice. Take a small amount of the chopped peel and whisk it into a simple vinaigrette with good olive oil, a little vinegar, and maybe some cumin. It’s a flavor explosion. It’s especially good in salads that need a strong, salty kick. Try it in my recipe for Moroccan carrot salad or toss it with some simple lentils or chickpeas.
- A Secret Weapon for Fish and Chicken: This is how you make chicken or fish taste like it came from a five-star restaurant. Make a simple paste: chop the preserved lemon peel very finely and mix it with minced garlic, fresh parsley, and a good amount of olive oil. This is a basic chermoula. Rub this paste all over a whole roasted chicken before you cook it. Or spread it over a nice piece of cod or salmon. The flavor is out of this world. It’s a marinade and a sauce, all in one.
How long do homemade preserved lemons last?
A long time. In the fridge, they’re good for at least 6 months. Maybe a year. Just keep the lemons covered in their juice. That’s the key.
Can I add other spices to the jar?
You can. Some people add peppercorns or a bay leaf. It’s not my mother’s way. The classic way is just lemons and salt. I think it’s best to try that first.
What’s a good substitute if I don’t have any?
There is no real substitute. The flavor is one of a kind. But in a pinch? Try this. Mix the fresh zest of a lemon with a good pinch of salt and a little juice. It’s not the same, but it will give you a bit of that salty-lemon kick.
From My Mother’s Kitchen to Yours
So that’s the secret. The whole story. From my mother’s kitchen, now to yours.
The real secret she gave me? It’s not just about lemons. It’s about patience. It’s about cooking with your heart. Now you have it too.
If you make a jar, I’d love to hear about it. Tell me how your journey went in the comments below.
Want more of these real recipes? The kind you don’t find in books? Then you should subscribe. We have a lot more roads to travel.
Besseha.
How to Make Preserved Lemons (My Mother’s Method)
Equipment
- 1 large glass jar with an airtight lid (approx. 1-quart or 1-liter)
Ingredients
- 8-10 medium lemons preferably organic, Meyer or Eureka
- ~1 cup coarse kosher salt or sea salt do not use iodized table salt
- 2-3 extra lemons for juice if needed
Instructions
- Sterilize the Jar: Wash your glass jar and its lid with hot, soapy water. While still wet, place it in an oven preheated to 350°F (175°C) for 20 minutes to sterilize it completely. Let it cool before using.
- Wash and Cut the Lemons: Scrub the lemons thoroughly under running water and dry them. For each lemon, slice off the very top and bottom tips. Stand a lemon on one end and cut it lengthwise into quarters, but do not cut all the way through. Stop about half an inch from the base, so the lemon opens like a flower but remains in one piece.
- Salt the Lemons: Open up a quartered lemon and generously pack about 1 tablespoon of coarse salt into all the crevices. Squeeze the lemon shut. Repeat this for all 8-10 lemons.
- Pack the Jar: Place a layer of salt at the bottom of your sterilized jar. Take the salted lemons and pack them into the jar as tightly as you can. Press down firmly on each lemon with a wooden spoon or your clean hands to release its juices. Sprinkle a little extra salt between the layers. The jar should be packed very tightly.
- Cure the Lemons: Seal the jar tightly and place it in a cool, dark place (like a kitchen cabinet) for 3 days. After 3 days, check the jar. The lemons should be fully submerged in their own juice. If they are not, squeeze the juice from your extra lemons and pour it into the jar until they are covered.
- The Final Wait: Seal the jar again and return it to its dark place. Let the lemons cure for at least 3 weeks to 1 month. During this time, the peel will soften and the flavor will mellow. Once opened, store the jar in the refrigerator. They will last for at least 6 months, often longer.
Notes
- The Right Salt: The most important rule is to never use iodized table salt. It will give a chemical taste to your lemons. Always use coarse kosher or sea salt.
- Submerged is Key: Air is the enemy. The lemons must always remain completely submerged in the salty brine to prevent mold.
- Cloudy Brine: Don’t worry if the liquid in the jar becomes cloudy or thick over time. This is a normal and good sign that the fermentation is working.
- How to Use: To use, remove a lemon from the jar and rinse it well to remove excess salt. Scrape out and discard the inner pulp (it’s very salty). Finely chop the tender peel and add it to your dishes.
Nutrition Information (Estimate)
| Nutrient | Amount per Serving (approx. 1/4 lemon) |
|---|---|
| Calories | ~15 kcal |
| Carbohydrates | 4g |
| Fiber | 1g |
| Sugars | 1g |
| Sodium | ~600-800mg (varies greatly) |
| Vitamin C | ~20% of DV |
| Protein | < 1g |
| Fat | < 1g |
Please note: This nutritional information is a rough estimate. The primary nutritional factor in preserved lemons is their high sodium content from the salt cure. Always rinse before use to reduce saltiness.
🍽️ Explore More Moroccan Flavors
Now that you have the secret to preserved lemons, it’s time to use them! Head over to my page of All Moroccan Recipes to find the perfect tagine, salad, or chicken dish to showcase your new favorite ingredient. Your next delicious journey is just one click away!
📩 Get More Secrets from the Road
This recipe is just one story from my years on the road. Want to know where my taxi is headed next? Subscribe to my newsletter, and I’ll send my best stories and authentic recipes straight to your inbox. You’ll be the first to know.
📩 Join Our Moroccan Foodie Community
Get the best Moroccan tagine recipes and seasonal culinary tips straight to your inbox.
Join the Conversation on Social Media!
Making your own jar of preserved lemons? I’d love to see it! Share a photo of your creation on social media and let me know how your journey went. It’s the best part of sharing these old recipes.
We’d Love to Hear Your Thoughts!
Your feedback is the fuel that keeps this taxi running! If you’ve tried making these preserved lemons, or if you have a question, please leave a comment below. I read every single one.
Did it work out for you? Do you have your own family secret for making them? Let’s keep the conversation going!