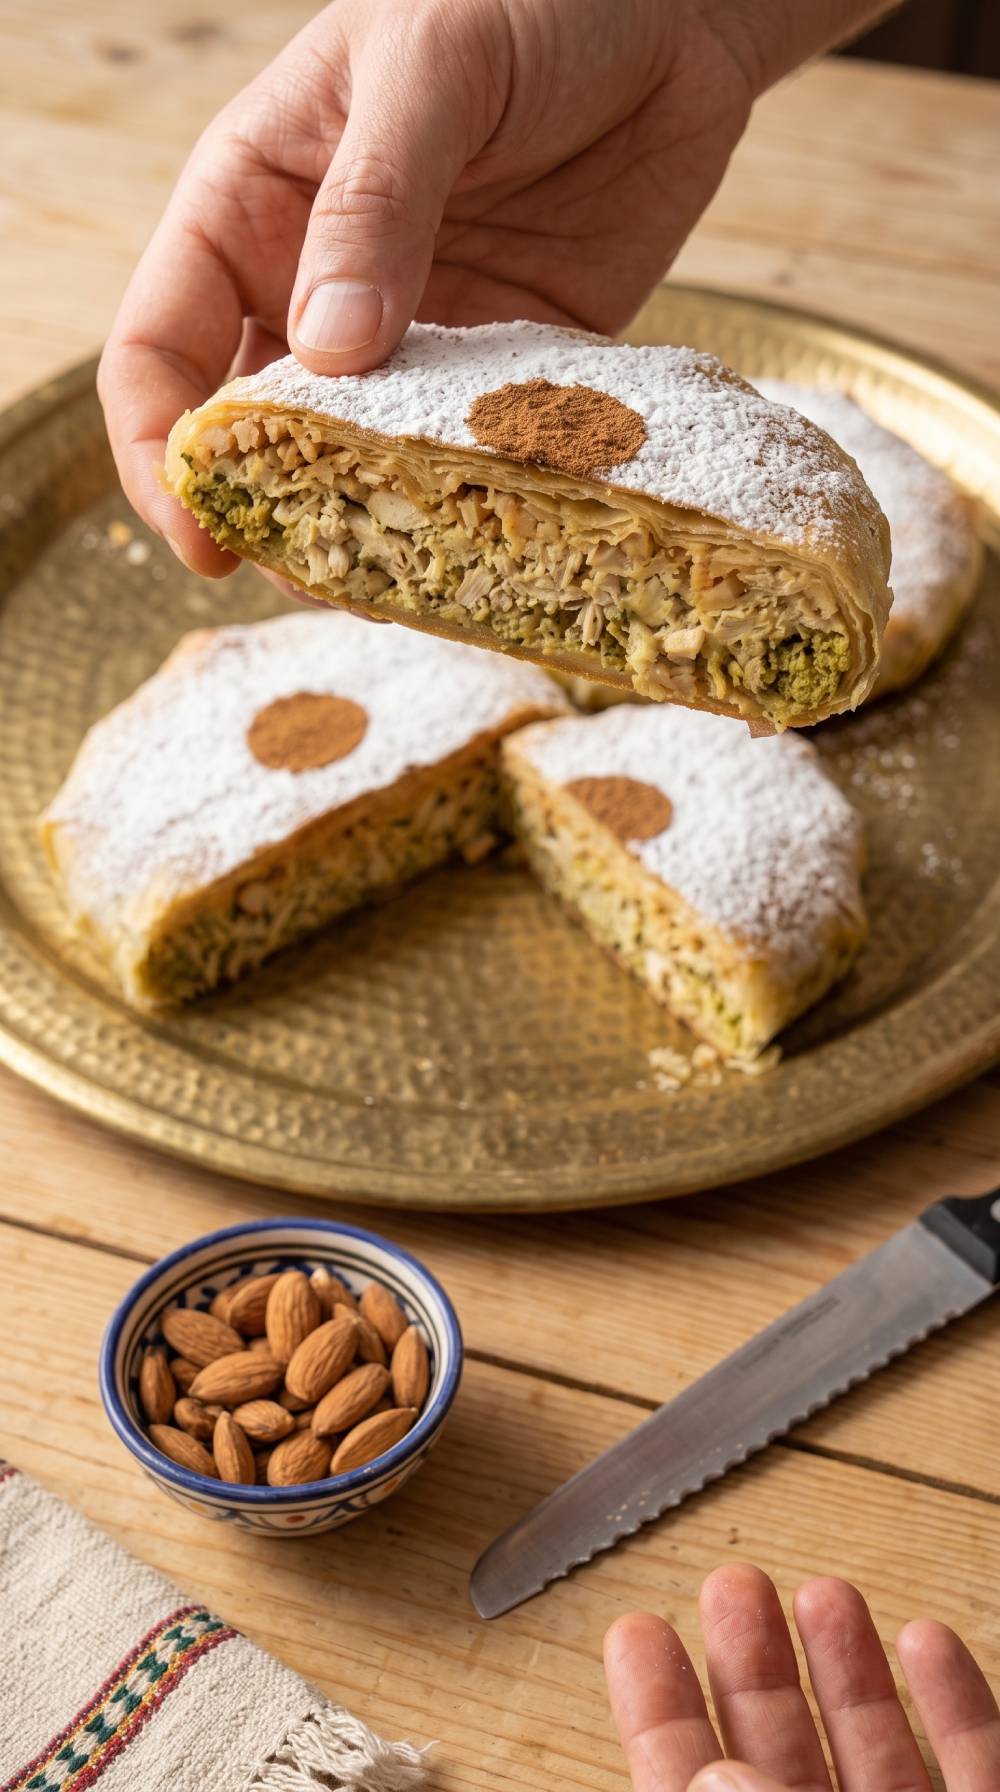
Moroccan Bastilla is a crisp, layered pastry filled here with spiced chicken, a soft onion-and-egg mixture, and toasted almonds scented with cinnamon and orange blossom water. This recipe makes six individual Bastillas, the way I remember eating them at my cousin Ilham’s table in Tangier.
My taxi work did not take me to Tangier very often. Maybe once or twice a year. But when a fare brought me that way, I already knew there was one stop I wanted to make before leaving the city.
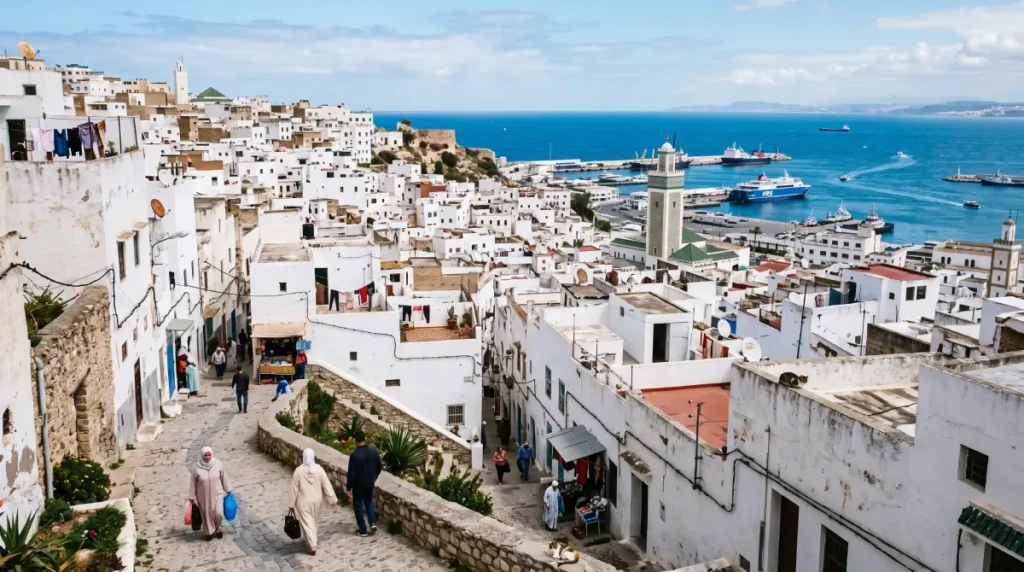
Tangier, where rare taxi trips gave me a chance to visit my cousin Ilham and eat her individual chicken Bastillas.
I would call my cousin Ilham and tell her I was coming.
And, almost every time, I would ask for the same thing.
Her small chicken Bastillas.
I liked the contrast first. The thin warqa breaking under the fingers. The warm chicken underneath. Then the onions and eggs, rich but not wet, followed by the almonds with their little sweetness from sugar and cinnamon.
But what stayed with me most was not only the taste.
At the table, I kept asking Ilham how she made them. I wanted to know what she did differently. What was the secret?
Her answer always came back to the same idea. It was a savoir-faire she had learned from her mother.
Years later, I understand better what she meant.
There was no mysterious spice hiding in the filling. The important part was knowing when the onions had reduced enough. Listening for that little crackle from the fat. Adding the eggs one at a time instead of rushing them into the pan. Letting the mixture lose its visible moisture, then cooling it completely before it ever touched the warqa.
Only after that came the three layers.
Eggs and onions.
Chicken.
Almonds.
That order is what I want to show you in this Moroccan Bastilla recipe. The ingredients matter, of course. But if you learn to control the moisture and let each stage finish before moving to the next, you are already much closer to the Bastilla I remember from Ilham’s table.
Table of Contents
The Individual Moroccan Bastillas I Ate at Ilham’s Table
Before I explain the method, I want to begin with the table where these Bastillas stayed in my memory. This part of the recipe belongs to Tangier, to my cousin Ilham, and to the small things I noticed long before I understood the technique behind them. The taste mattered, of course. But so did the way she worked.
A Rare Taxi Trip to Tangier
Because my work was in a grand taxi, some roads became familiar to me. Tangier was different. I did not have fares taking me there every week or even every month. A trip might come once or twice in a year.
That made it easy to remember.
When I knew I was heading toward Tangier, I would call my cousin Ilham before I arrived. Part of the pleasure was seeing her, of course. But she also knew what I was going to ask.
Her small chicken Bastillas.
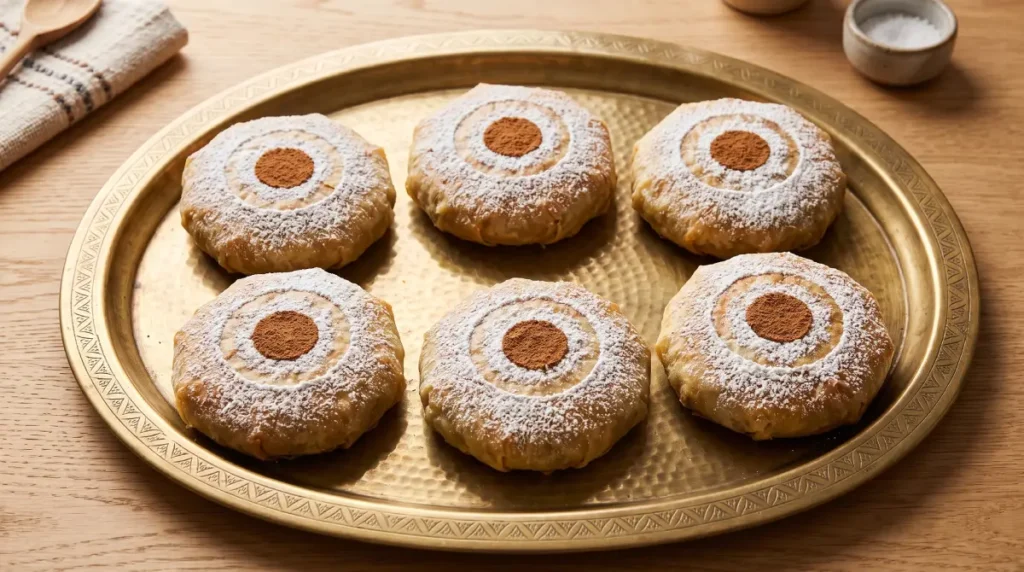
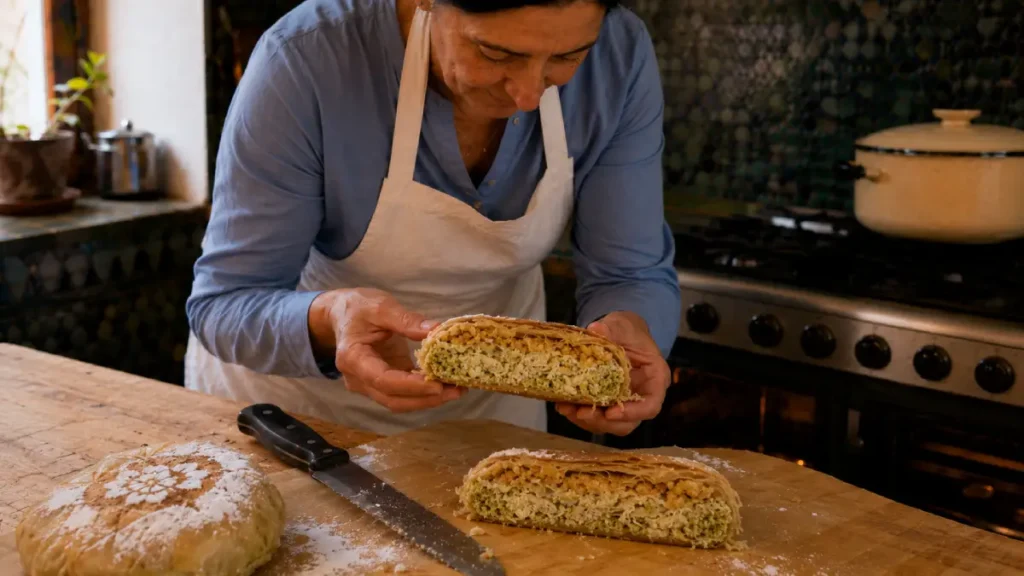
They were individual, not one large pie brought to the middle of the table. Each one had its own thin shell of warqa, browned on the outside and holding three fillings inside.
I did not think about those layers in a technical way then. I noticed how they ate.
First, the pastry broke.
Then came the soft onion and egg filling, the chicken, and finally the almonds with cinnamon and a little sweetness.
Nothing felt wet inside. Nothing ran out when the Bastilla was opened.
At the time, I noticed that mostly because it tasted good. Later, I understood how much work had gone into making it feel so simple.
The Question I Asked Her Every Time
Once we were sitting at the table, I usually came back to the same question.
How did she make them like that?
I was not asking for the list of spices. I could taste cinnamon. I knew there were onions, chicken, eggs, and almonds. I wanted to know what she was doing in the kitchen that I could not see from the finished Bastilla.
Ilham’s answer always came back to her savoir-faire, something she had learned from her mother.
That answer stayed with me because she never tried to make the recipe sound mysterious.
There was no special powder.
No hidden spoonful of something expensive.
No ingredient she refused to name.
Ilham never pointed me to one secret ingredient. What she gave me was a way of working, learned from her mother.
That difference matters.
An ingredient can be written on a shopping list. Savoir-faire is harder to write down. You have to notice what the food is doing.
Her Secret Was a Method, Not an Ingredient
When I later paid more attention to her method, I began to understand what she meant.
The important moments came one after another:
- Let the onions cook down until most of their liquid is gone.
- Listen for the small crackling sound as the fat begins to show itself again.
- Add the eggs gradually, one at a time.
- Let each egg disappear into the onion mixture before adding the next.
- Keep cooking until no visible liquid collects in the pan.
- Let that mixture cool completely.
- Keep the onion-and-egg mixture, shredded chicken, and almonds as three separate layers.
- Only then bring the warqa around the filling.
None of those steps sounds dramatic.
Together, they change the Bastilla.
If the onion mixture is still watery, that moisture has somewhere to go once it is wrapped. The warqa is the first place it finds. If the filling goes inside while it is still hot, the same problem becomes harder to avoid.
So for me, this recipe begins before the folding.
It begins in the pan.
Why That Lesson Stayed With Me
Over the years, I learned many things about the food of Morocco in this same way. Not from one large lesson, but from watching somebody do one small thing properly and then asking why.
Sometimes the answer came from my mother.
Sometimes from an aunt.
In Tangier, this one came from Ilham, who had learned it from her own mother.
There is something very ordinary about that kind of teaching, and that is exactly why I value it. A family recipe does not always arrive on a written card with exact temperatures and minutes. Sometimes what passes from one generation to another is a sound to listen for, a texture to recognize, or the knowledge that a filling needs another few minutes before it is ready.
That kind of transmission goes beyond my own family. UNESCO describes food practices as knowledge, skills, and social practices that communities pass from one generation to the next.
For this Moroccan Bastilla, the lesson I carried home from Ilham was very practical:
Do not judge the filling only by the clock. Look at the moisture. Listen to the pan. Let one stage finish before you begin the next.
That is the part of her savoir-faire I want to keep in this recipe.
What Is Moroccan Bastilla and What Makes This Version Different?
Moroccan Bastilla can be difficult to describe with one word. It is crisp outside, tender inside, savory from the chicken and onions, yet gently sweet from the almonds, cinnamon, and powdered sugar.
The version I make here is even more specific. These are six individual chicken Bastillas, built in three separate layers and wrapped only after the filling has cooled and lost its excess moisture.
What Is Moroccan Bastilla?
Moroccan Bastilla is a thin, crisp pastry filled with savory and sweet elements. In this version, the filling is made from spiced chicken, slow-cooked onions and eggs, and toasted almonds scented with cinnamon and orange blossom water.
Then everything is enclosed in warqa and baked until golden.
If I were explaining it quickly to somebody who had never eaten one, I might call it a Moroccan chicken pie.
But that only explains the shape.
What makes Bastilla interesting to me is the contrast.
The pastry should crack when you cut or bite into it. Underneath, the filling should be tender but never watery. Then the almonds bring a different texture and a little sweetness without turning the whole dish into dessert.
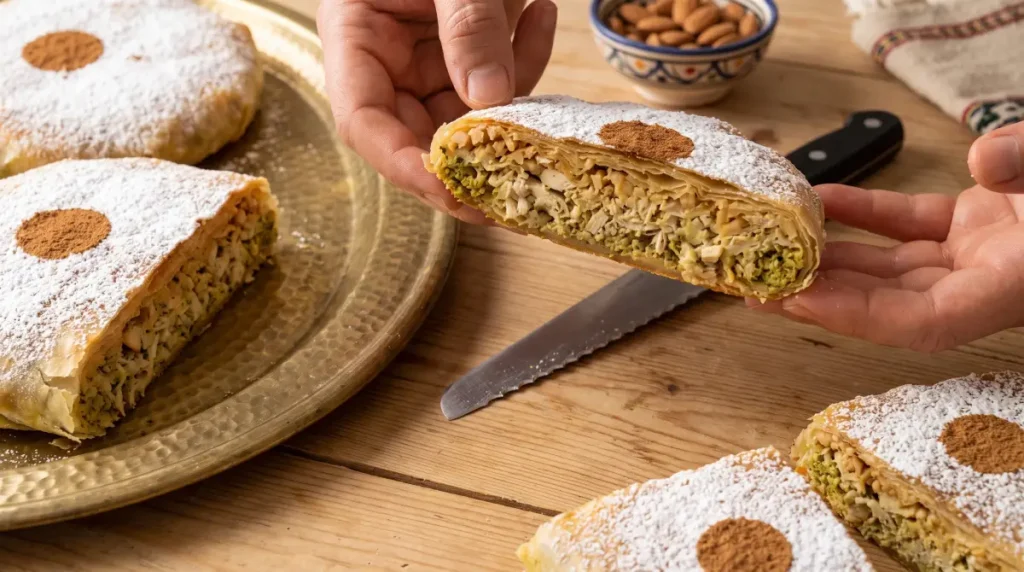
I look for four things in every one:
- a thin, crisp pastry outside;
- tender spiced chicken;
- an onion-and-egg layer with no loose liquid;
- toasted almonds that remain a separate layer.
For me, a good Bastilla does not taste like one filling mixed. You should still notice what each layer brings.
That is why I keep the three fillings separate until the Bastilla is assembled.
Bastilla or Pastilla: Why You May See Both Names
If you search for this dish in English, you will often come across the word Pastilla.
Here on TajineRecipes, I use Bastilla.
The different spelling can look confusing when you first encounter the dish, but it should not distract you from the recipe itself. The Cambridge English Dictionary uses pastilla and defines it as a Moroccan meat pie. Its entry also mentions the paper-thin pastry called warka and the combination of sweet and salty flavors associated with Moroccan pastillas.
That description gets very close to what you will see in this recipe.
Thin pastry.
Savory chicken.
A little sweetness.
And several textures meeting in one small pie.
Whether you arrive here after searching for Moroccan Bastilla or Moroccan Pastilla, the important part in my kitchen is not the spelling.
It is what happens inside the pastry.
The onions still need time to reduce. The eggs still have to be incorporated without leaving liquid behind. The filling still needs to cool before it touches the warqa.
Those details matter much more once the pan is on the stove.
Why I Make Six Individual Chicken Bastillas
You can make Bastilla as one large centerpiece, but that is not the version I wanted to preserve here.
Ilham made hers small.
Individual.
That is how I remember eating them at her table, so this recipe makes six.
Before I begin wrapping, I divide the filling with those six Bastillas in mind. It helps me keep a similar balance from one to the next.
Each one receives the same order:
- Onion and egg mixture
- Shredded chicken
- Toasted almond mixture
Then I close the warqa around those layers.
Working individually also makes it easier to notice when something is out of balance. If I pile too much onion mixture into one, I know before folding. If the almond layer is too thick, I can correct it before the pastry closes.
I do not worry if every Bastilla is not perfectly identical.
They are made by hand.
One may be a little rounder. Another may have a fold that shows slightly more.
That does not bother me.
I would rather have six Bastillas with balanced fillings than six perfect circles with the wrong amount inside.
What I care about is that each one closes properly, keeps its filling inside, and has enough exposed pastry to become crisp in the oven.
Chicken Bastilla and Seafood Bastilla Follow Different Paths
Bastilla does not have to stop with chicken.
I also make a Moroccan seafood Bastilla, but I do not treat it as this recipe with the chicken removed.
The two fillings behave differently.
This chicken Bastilla depends on three clearly separated layers:
- reduced onions and eggs;
- shredded spiced chicken;
- toasted almonds with cinnamon and orange blossom water.
The seafood version follows another direction in both filling and seasoning.
That distinction matters because a recipe is more than the pastry wrapped around it. The moisture, seasoning, texture, and order of the filling all affect what happens when the Bastilla reaches the oven.
With this chicken version, I want the almond layer to stay recognizable. I want the chicken underneath it to remain tender. And beneath that, the onion-and-egg mixture should be rich but dry enough that the warqa has a chance to stay crisp.
Chicken Bastilla and seafood Bastilla may belong to the same family.
But they should not taste like the same recipe wearing a different filling.
Ingredients and the Three Fillings That Build the Bastilla
When I prepare these Bastillas, I do not think of the filling as one mixture. I think of three parts that need to be ready on their own before they ever meet inside the warqa.
That makes the work easier to understand.
The chicken brings the savory center. The onions and eggs bring softness and richness. The almonds bring texture, cinnamon, and a little sweetness. If one part is too wet or too heavy, the balance changes.
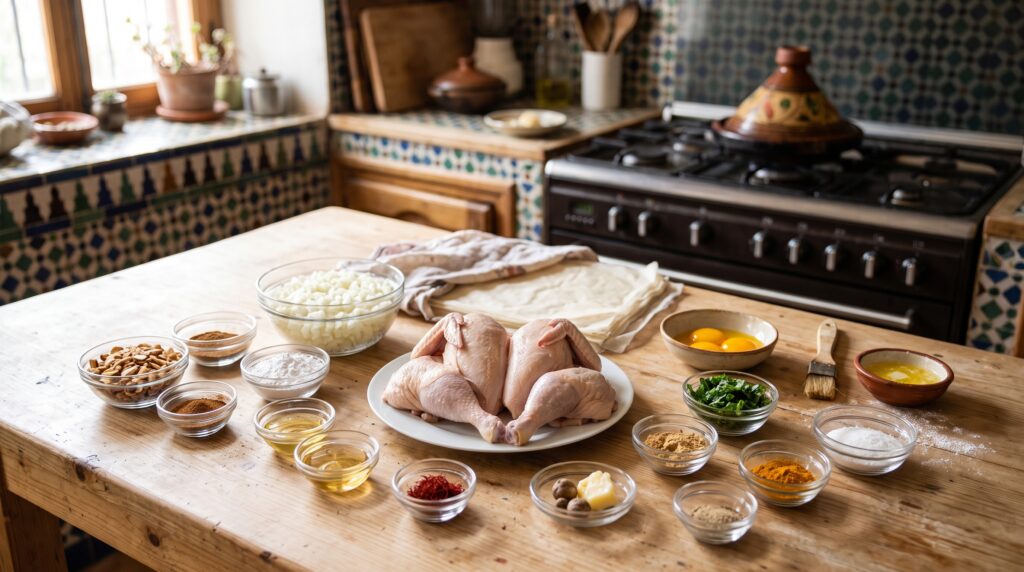
The Spiced Chicken and Onion Base
This recipe starts with a whole chicken of about 1.5 kg, or 3.3 pounds, cut into quarters with the skin removed.
It goes into the pot with finely chopped onions, vegetable oil, parsley, and the spices.
For this version, I use:
- ground ginger;
- turmeric;
- white or black pepper;
- ground cinnamon;
- salt;
- a few saffron threads, if I have them;
- a little smen, if available;
- two grains of mastic, also optional.
I do not use much saffron here.
Three or four small threads are enough for me. I rub them gently between my fingers and let them fall into the pot.
The turmeric stays in the recipe whether I use saffron or not. They are not replacing one another here.
The onions are just as important as the chicken.
There is a full kilogram of them, about 2.2 pounds. That may look like a lot when they first go into the pot, but they cook down and become the base for the egg mixture later.
So I do not think of the onions as a side ingredient.
They are one of the main structures of the Bastilla.
The Onion and Egg Filling
Once the chicken is cooked and removed from the pot, the onions stay behind with the cooking juices.
This is where I stop thinking about sauce and start thinking about filling.
The mixture has to reduce.
The eggs come later, but they are not simply scrambled and added on top. They are worked into the reduced onions one at a time until the mixture becomes thick, soft, and free of visible liquid.
That distinction is important.
I want the onion-and-egg filling to be:
- rich, but not runny;
- soft, but not loose;
- moist enough to stay tender;
- dry enough not to soak the warqa.
The eggs should carry the flavor of the onions and spices, not bring a new pool of liquid into the pan.
This is also why I keep this layer separate from the shredded chicken.
If I mix everything together too early, it becomes harder to see whether the onions and eggs have really reached the right texture.
Later, when we cook this filling, I will show you the sound I listen for before the eggs go in.
The Almond Layer with Cinnamon and Orange Blossom Water
The almond layer goes in last, just before the Bastilla is closed.
For six individual Bastillas, I use about 400 grams of toasted almonds, roughly chopped rather than turned into a fine powder.
Then I mix them with:
- 3 tablespoons powdered sugar;
- 1 teaspoon ground cinnamon;
- 2 tablespoons orange blossom water.
I want the almonds to stay noticeable when I bite into the Bastilla.
Too finely ground, and they lose some of that contrast.
Too coarse, and the filling becomes awkward to spread.
Somewhere in between works best for me.
The orange blossom water should perfume the almonds without making them wet. I add enough to bring the mixture together lightly, not enough to turn it into a paste.
Almonds also appear in other Moroccan chicken dishes I make, such as my chicken tagine with apricots and almonds, but they play a very different role here.
In that tagine, they join the sauce and fruit.
In Bastilla, I want them to remain a distinct third layer.
Le Cordon Bleu also uses the combination of almonds and orange blossom water in its Moroccan cookery program, where the M’hanncha pastry is prepared with almonds, honey, and orange blossom water.
I like that connection because it shows how naturally almonds and orange blossom can sit together in Moroccan pastry.
Warqa, Phyllo, Butter and Egg Yolks
Warqa is the pastry used in the method I learned for these Bastillas.
It is thin enough to fold around the three layers without making the finished Bastilla feel heavy.
If you can find Moroccan warqa, that is what I would use.
If you cannot, phyllo dough is the practical substitute given in the original method I followed, and it makes this recipe much easier to reproduce outside Morocco.
For six Bastillas, I plan on:
- 12 medium warqa sheets, two for each Bastilla;
- about 4 to 6 tablespoons melted butter, as needed for brushing;
- 2 to 3 egg yolks, as needed for sealing.
The butter has a simple job.
It helps the pastry brown and keeps the layers from feeling dry.
The egg yolk has another job.
It helps the folds stay closed.
I do not measure either one with unnecessary precision while wrapping. I keep a little bowl nearby and use what I need.
The important thing is that every Bastilla is closed securely and lightly coated before it reaches the oven.
Before I start assembling, I make sure four things are ready:
- the onion-and-egg mixture is completely cool;
- the chicken is shredded;
- the almond mixture is prepared;
- the warqa, melted butter, and egg yolks are within reach.
Once those are ready, the folding becomes much calmer.
How to Make Moroccan Bastilla Without a Soggy Filling
The part that worries many people about Bastilla is the pastry. Will it tear? Will it fold correctly? Will it become golden?
I understand that.
But for me, the real work happens earlier.
If the filling carries too much liquid into the warqa, even a beautiful fold cannot save it. So before I think about shaping these six Bastillas, I pay attention to what is happening in the pot.
This is where Ilham’s method matters most.
Cook the Chicken Slowly and Build the Broth
I begin with the chicken, onions, oil, parsley, and spices together in the pot.
For about 10 minutes, I keep them over medium heat.
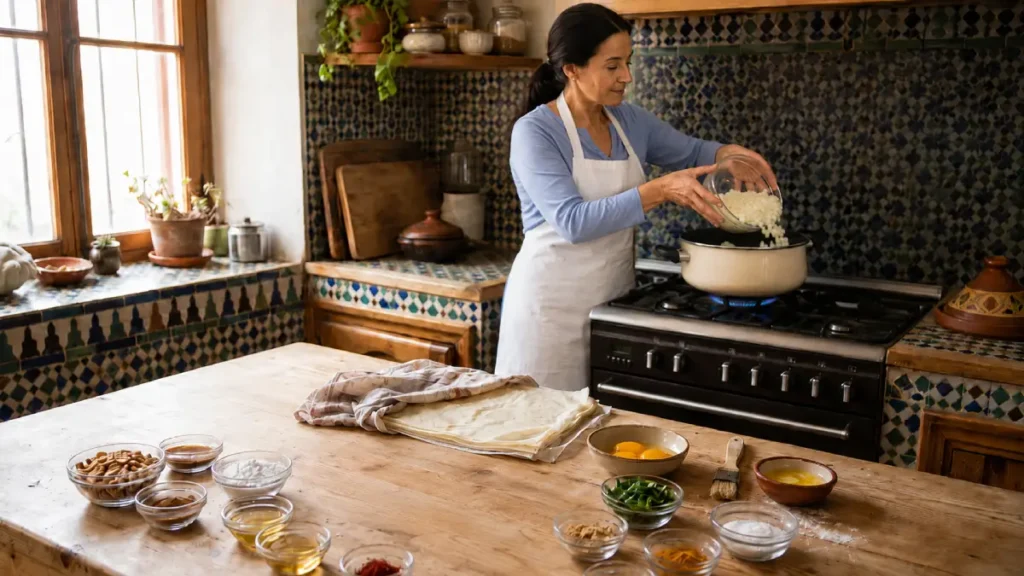
I turn the chicken from time to time so the pieces meet the onions and spices on different sides. The onions begin to soften, their volume starts to fall, and the smell of the spices becomes warmer.
I am not trying to brown the chicken hard.
I am giving everything time to start cooking together.
After those first 10 minutes, I add 100 ml water, about a scant 1/2 cup.
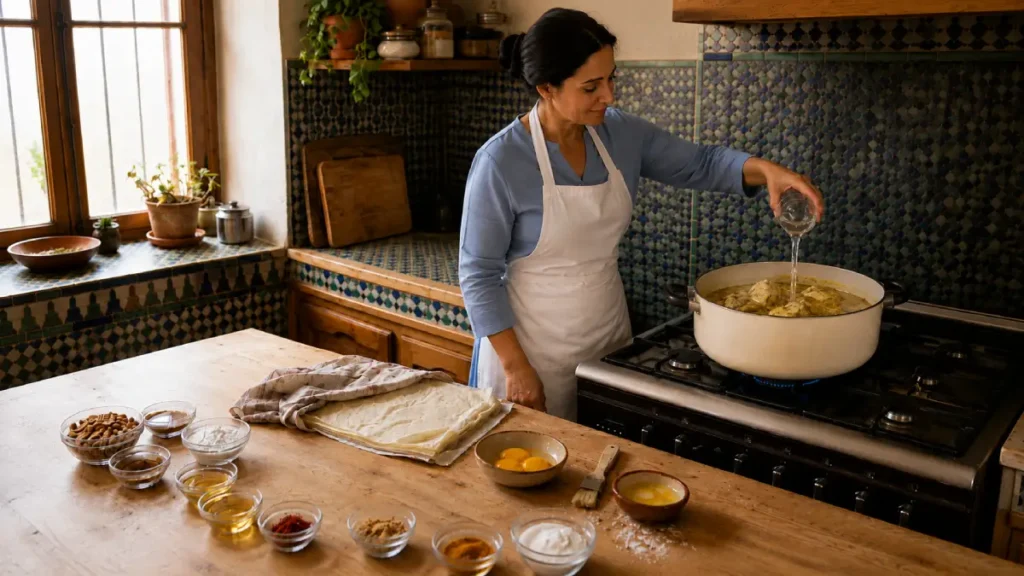
It may not look like much.
That is intentional.
The onions will release moisture of their own, and I do not want to begin this Bastilla with a pot full of water that I will have to fight later.
I cover the pot, lower the heat, and let the chicken cook gently for about 30 to 40 minutes.
The clock gives me a range.
The chicken tells me when it is ready.
I pierce the thickest part with a fork or the tip of a knife. The meat should feel tender, and around the joints it should begin to loosen easily.
Once the chicken is tender and safely cooked, I remove all four pieces from the pot and set them aside to cool enough to handle.
What stays behind is just as important as what comes out.
Onions.
Spices.
Cooking juices.
And the beginning of the filling.
Reduce the Onion Mixture Until You Hear the Crackle
After removing the chicken, I add the remaining chopped parsley and keep the onions over low heat.
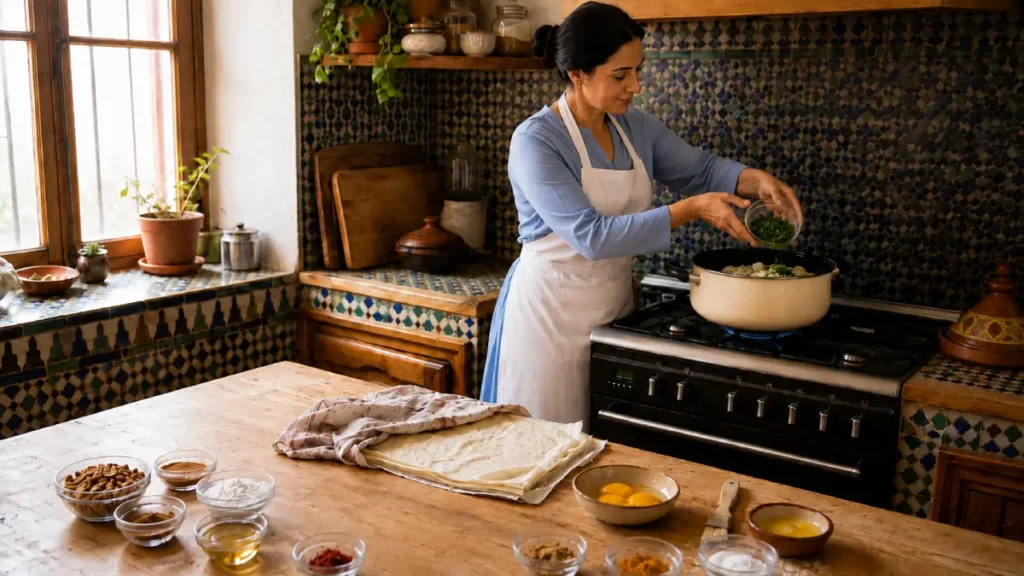
This is not the moment to hurry.
At first, the mixture still looks like a sauce. You can see liquid moving between the onions, and the sound from the pot is soft and wet.
I let that moisture cook away gradually.
As it reduces, I watch the bottom of the pot more closely. I stir when needed so the onions cook evenly and do not catch.
Then something changes.
The mixture no longer moves like a sauce.
There is almost no free liquid left around the onions.
And the sound changes too.
Instead of only hearing a wet simmer, I begin to hear small crackles from the fat in the pot.
That is the sound I remember.
Look first.
Then listen.
The crackle is useful because it tells me that much of the water has already left the mixture. I do not need the onions to become dry or browned. I need them concentrated enough that I can move to the eggs without carrying unnecessary liquid with me.
There is an important difference between:
- onions that are still sitting in cooking liquid;
- onions that are moist and concentrated;
- onions that have been cooked too far and are beginning to stick.
I want the middle one.
Soft onions.
Concentrated flavor.
Almost no loose liquid.
A small crackle underneath.
That is when I reach for the eggs.
Add the Eggs One at a Time and Remove the Moisture
I use six eggs, but I do not pour six beaten eggs into the pot at once.
I add the first egg.
Then I stir it into the onions.
I wait until I can no longer see loose egg before adding the second.
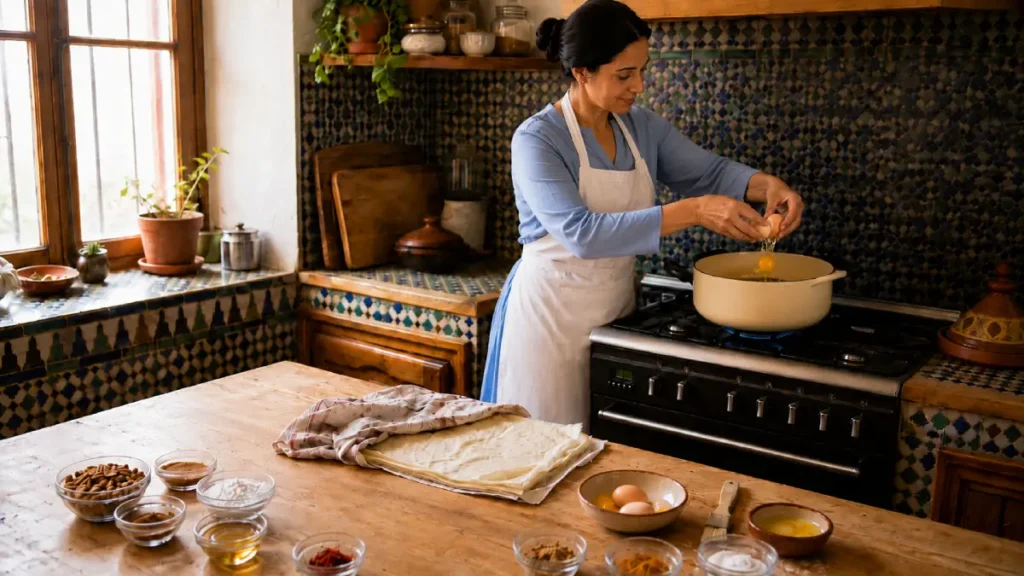
Then the third.
And I continue the same way until all six are incorporated.
One egg.
Let it disappear.
Then the next.
This takes a little more attention than adding them all at once, but it gives me much better control over the texture.
As the eggs cook with the onions, the mixture begins to form soft little clumps. It becomes thicker and heavier on the spoon.
I keep stirring gently until I cannot see liquid collecting around the edges or underneath.
This is one of the most important answers to the question:
How do you keep Moroccan Bastilla from becoming soggy?
You do not solve that problem in the oven.
You solve much of it here.
Before the warqa ever touches the filling.
I look for an onion-and-egg mixture that is moist enough to stay tender, but dry enough to sit in a spoon without leaving liquid behind.
Then I turn off the heat.
And I wait.
The mixture needs to cool completely before assembly.
Warm filling creates steam inside the pastry. Steam is moisture. And at this stage, I have already spent too much time removing moisture to invite it back.
While the onion mixture cools, I debone the chicken.
I remove the bones and any tough tendons, then pull the meat into small pieces with my fingers.
I do not turn it into a paste.
I want pieces of chicken that will still be recognizable in the second layer of the Bastilla.
How to Know the Filling Is Ready
This is one of those moments when I trust what I see and hear more than one exact number on the clock.
Before I begin folding the Bastillas, I check the filling again.
Here is what I look for:
- almost no free liquid remaining around the onions;
- a light crackling sound from the fat before the eggs are added;
- each egg fully incorporated before the next one enters the pot;
- soft clumps in the finished onion-and-egg mixture;
- no watery pool forming at the bottom;
- chicken that is tender and easy to pull from the bones;
- onion-and-egg filling cooled completely before it touches the warqa.
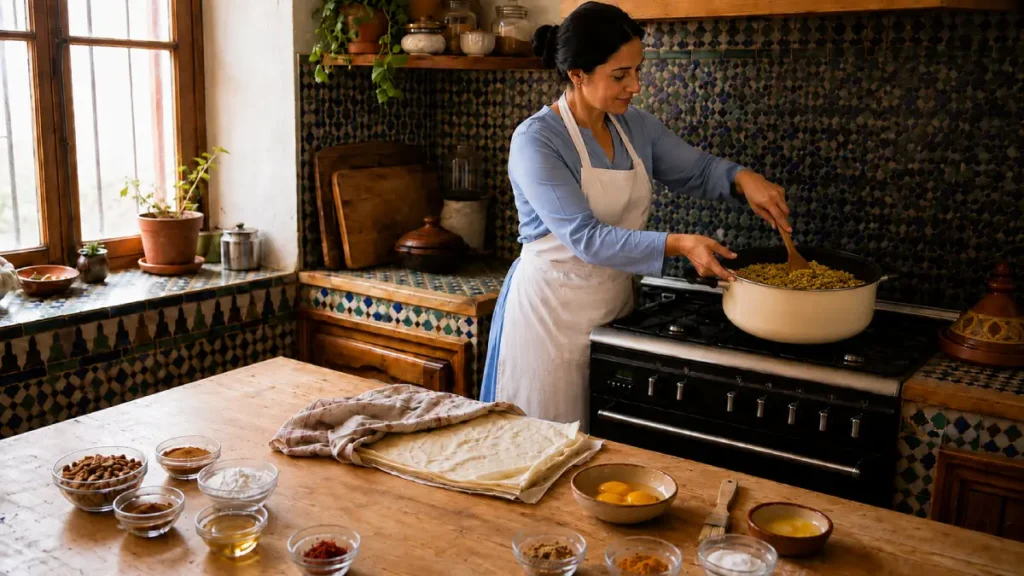
If I tilt the pot and liquid runs immediately to one side, I am not ready.
If the mixture looks soft but stays together, I am much closer.
What I learned from Ilham was simple: finish one stage before asking the next one to begin.
The onions should finish reducing before the eggs arrive.
The eggs should finish cooking before the mixture cools.
The filling should finish cooling before the warqa comes out.
That kind of attention is something I return to often in Moroccan cooking. A recipe can give you minutes, measurements, and temperatures.
The pan still has something to tell you.
For this Bastilla, listen to it.
Assemble, Bake and Serve the Individual Bastillas
Once the fillings are ready, the difficult part is behind me.
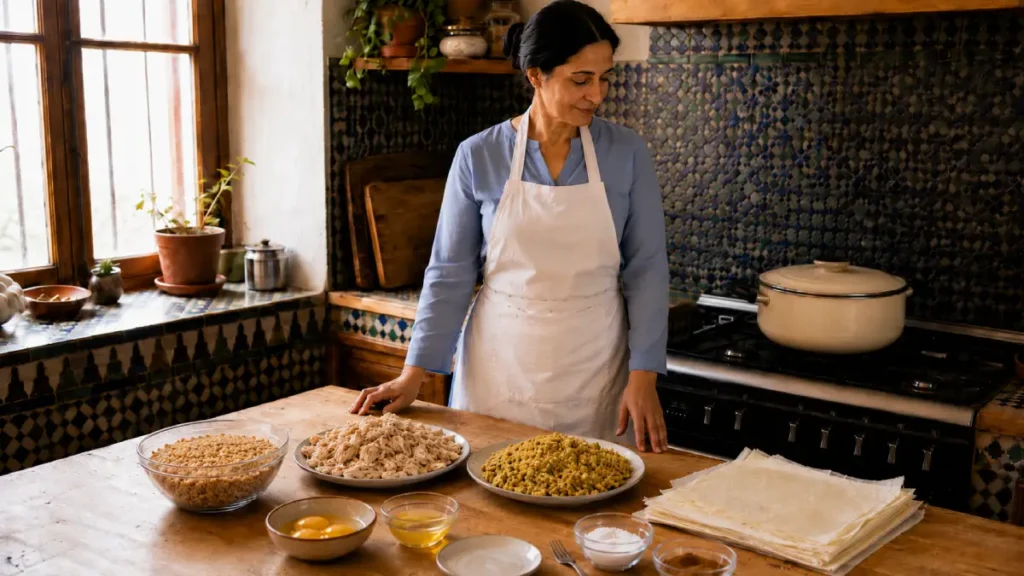
The onion-and-egg mixture has cooled. The chicken is shredded. The almonds are prepared. Now the work changes from the pot to the table.
This part should feel calm.
I like to have everything within reach before I open the warqa, because thin pastry does not benefit from waiting around while I look for butter, egg yolk, or another bowl.
Layer the Filling in the Right Order
Before I begin, I divide the three fillings with six Bastillas in mind.
I do not weigh every portion.
I look for a similar balance from one Bastilla to the next.
For each one, I start with a buttered sheet of warqa and build the filling in the same order:
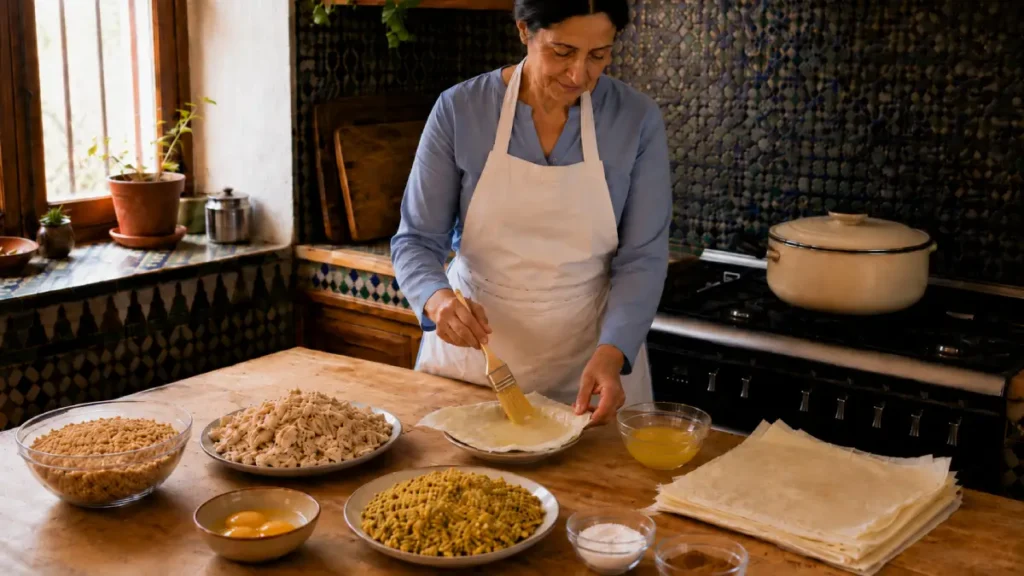
- Onion and egg mixture
- Shredded chicken
- Almond mixture
The onion-and-egg mixture goes down first.
I spread it gently into a small round layer rather than piling it into a high mound.
Then comes the chicken.
I press it lightly enough to keep the Bastilla easy to close, but I do not crush the meat into the layer underneath.
The almonds come last.
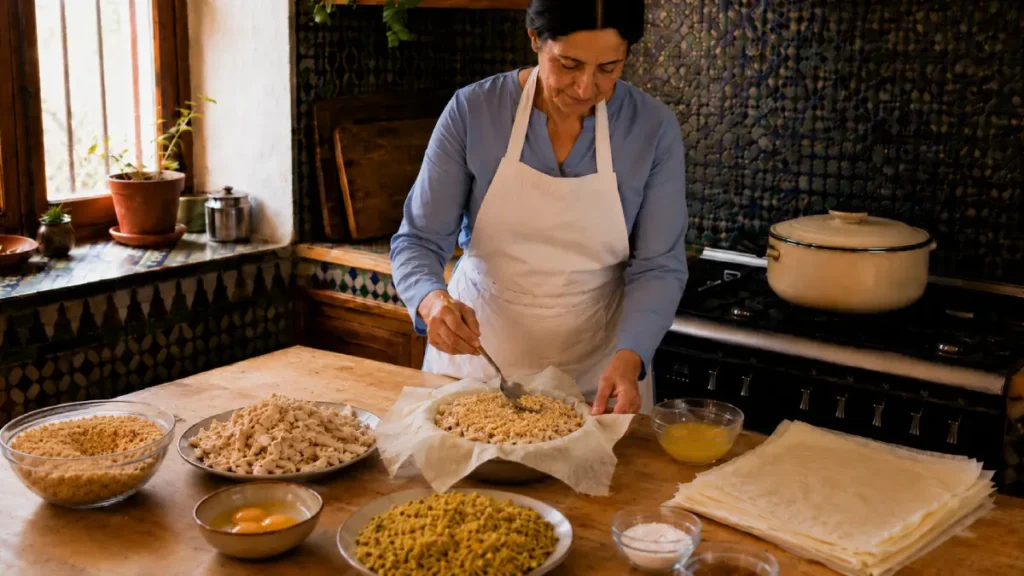
They should sit over the chicken as their own layer, with the cinnamon and orange blossom still noticeable.
That separation is important to me.
When the Bastilla is opened, I want the filling to make sense.
Soft onions and eggs below.
Chicken in the middle.
Almonds above.
I build the Bastilla in layers because I want to taste the layers later.
There is no advantage in spending time preparing three different fillings only to mash them together at the end.
Fold and Seal the Warqa
Once the filling is in place, I bring the edges of the warqa toward the center.
One fold at a time.
I work around the circle until the filling is enclosed.
A little egg yolk helps hold the last folds together.
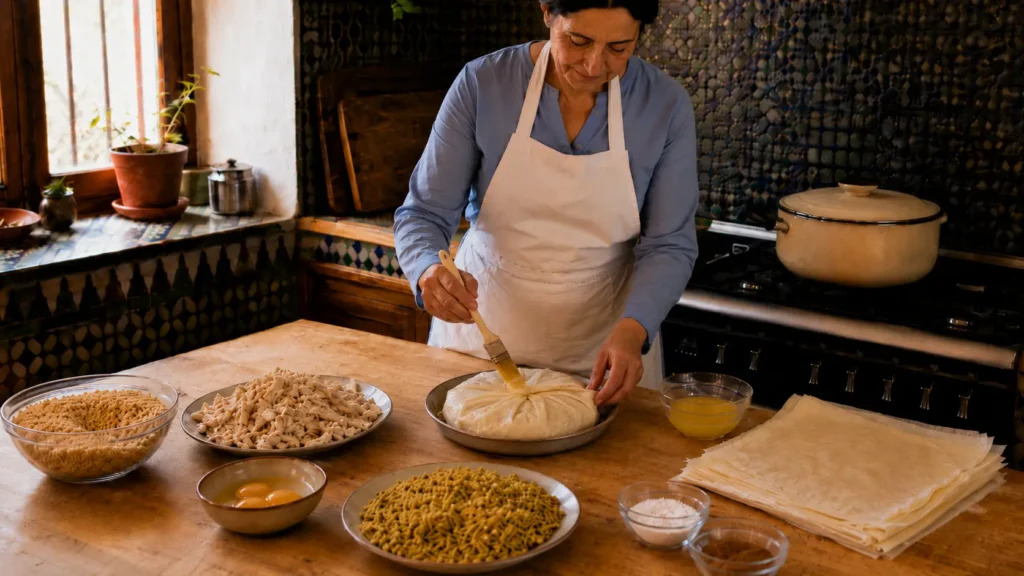
Then I use the second sheet of warqa.
This second sheet gives the Bastilla more support and helps cover the first folds neatly. I place the folded side down on the new sheet, bring the edges around again, and shape the Bastilla gently with my hands.
I am looking for a compact round shape, not a perfectly manufactured circle.
If one edge is slightly different from another, I leave it alone unless the filling is exposed.
What matters is that:
- the filling is fully enclosed;
- there are no large openings;
- the pastry is not torn around the filling;
- the Bastilla can be lifted without coming apart.
I brush the outside with melted butter once it is closed.
Not soaked.
Just coated.
The butter should reach the folds and the exposed surface so the pastry has a chance to color evenly in the oven.
At this stage, I keep returning to one rule:
Cool filling. Gentle hands. Secure folds.
If the filling was prepared properly, wrapping becomes much easier.
Bake Until Golden and Crisp
I arrange the six Bastillas on a baking tray with a little space between them.
The oven is heated to 350°F / 180°C.
They bake for about 20 to 25 minutes.
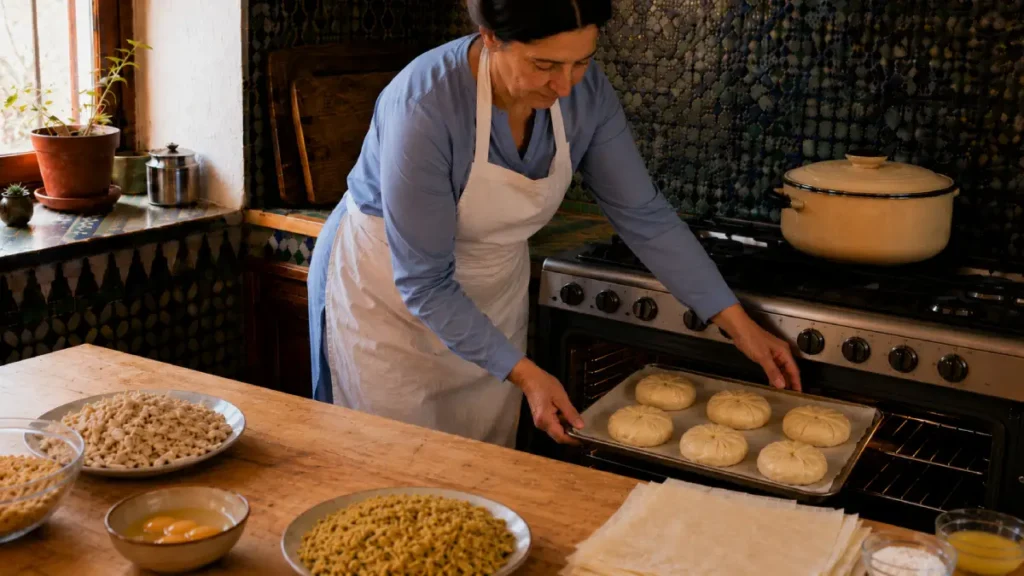
But once again, the clock is only part of the answer.
I want to see the pastry change.
At first, the warqa still looks pale and soft.
Then the edges begin to color.
The surface becomes firmer.
By the end, I am looking for Bastillas that are:
- golden across the top;
- crisp around the folded edges;
- dry-looking on the surface rather than greasy;
- firm enough to lift without losing their shape.
If they still look pale after 20 minutes, I give them a little more time.
Ovens do not all behave the same way.
The color matters more to me than stopping at exactly minute twenty-five.
When they are ready, I take them out and let them rest briefly.
I do not decorate them the second they leave the oven.
A few minutes make them easier to handle, and I still want to serve them warm.
Finish with Powdered Sugar and Cinnamon
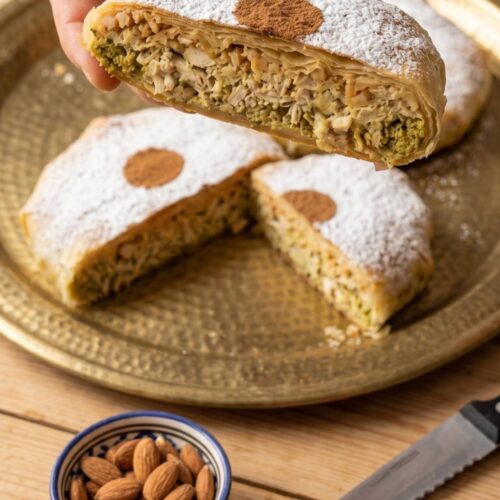
The decoration is simple: a light dusting of powdered sugar with a small cinnamon circle in the center of each Bastilla.
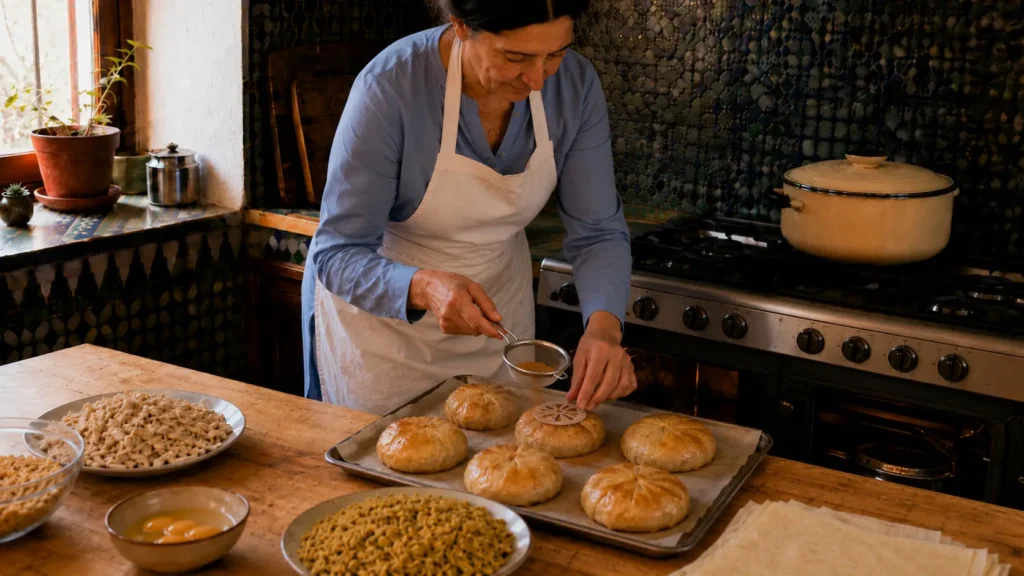
Nothing complicated.
Nothing different from one Bastilla to the next.
The decoration should tell you something about the flavor waiting inside, not hide the pastry underneath.
For six Bastillas, I keep approximately:
- powdered sugar as needed, up to about 100 g;
- 1 to 2 tablespoons ground cinnamon, as needed.
I sift the sugar lightly over the surface, then add the cinnamon.
The Bastillas are best served warm, when the outside is still crisp, and the filling inside is tender.
If there are leftovers, I let them cool and refrigerate them promptly. The USDA food-safety guidance recommends refrigerating cooked leftovers within two hours and using most cooked leftovers within three to four days.
For the pastry, warmth is not the only goal when reheating.
You also want the outside crisp again.
An oven is more useful for that than steaming the pastry in a microwave.
And when these Bastillas come back to the table, I still look for the same thing I wanted when I first closed the warqa.
A crisp shell.
Three recognizable layers.
No liquid running onto the plate.
If you want to continue exploring the dishes I cook at home, you can browse my Moroccan recipes and build the rest of the table from there.
What is Moroccan Bastilla?
Moroccan Bastilla is a crisp pastry filled with savory and gently sweet layers. In this version, I use chicken, a reduced onion-and-egg mixture, and almonds flavored with cinnamon and orange blossom water.
For me, what makes a good Bastilla is not only what goes inside it. The filling must be dry enough, the layers should remain distinct, and the warqa should stay crisp around them.
When I cut one open, I want to see the work that went into it rather than one soft mixture hiding inside the pastry.
Is Bastilla the same as Pastilla?
Yes. Bastilla and Pastilla are two spellings used for the same Moroccan dish.
I grew up hearing Bastilla, so that is the name that comes naturally to me. You may also see Pastilla in English books, restaurant menus, and other references.
The spelling changes.
The dish does not.
Can I use phyllo dough instead of warqa?
Yes. If I cannot find Moroccan warqa, I would rather use phyllo than abandon the recipe.
Warqa is what I associate with Bastilla, but phyllo can give you the thin, crisp pastry this dish needs. Handle it gently, keep the sheets from drying out while you work, and brush them lightly with melted butter.
The important part is not to overload the pastry with a wet filling.
A strong sheet of pastry cannot rescue filling that still has liquid running through it.
Why does Moroccan Bastilla become soggy?
Most of the time, I look at the filling before I blame the pastry.
The onion mixture needs enough time to reduce before the eggs go in. Then the eggs should be added gradually and cooked until there is no watery pool left in the pot.
And after that, I let the filling cool.
That last part matters.
Warm filling trapped inside warqa creates steam. Steam and crisp pastry are not good friends.
If the filling is still wet when you begin folding, the problem has already started.
How do I know the onion-and-egg filling is dry enough?
I look at the pan before I look at the clock.
The onions should be soft and concentrated, with almost no loose liquid around them. Before adding the eggs, I listen for that small crackle from the fat.
Then I add the eggs one at a time.
At the end, the mixture should form soft clumps and stay together when I move it with the spoon. If I tilt the pot and liquid immediately runs to one side, I keep cooking.
That is one of the most useful lessons I carried home from Ilham.
Is Moroccan chicken Bastilla sweet or savory?
It is both, but I would still call chicken Bastilla a savory dish.
The chicken, onions, eggs, ginger, turmeric, pepper, parsley, and other seasonings give it its savory center. The almonds, cinnamon, orange blossom water, and powdered sugar bring sweetness around that center.
I do not want either side to dominate.
The pleasure is in meeting both in the same bite.
Can I prepare the Bastilla filling ahead of time?
Yes, and I actually prefer assembling the Bastillas only after the fillings have cooled completely.
You can prepare the chicken, onion-and-egg mixture, and almonds first, keep them separate, and assemble the Bastillas later.
That separation makes the work calmer.
It also means I am not trying to handle delicate warqa while waiting for hot filling to cool beside me.
Should I mix the chicken, eggs, onions, and almonds before filling the Bastilla?
I do not.
I keep them as three separate layers:
onion and egg mixture;
shredded chicken;
almond mixture.
That is the way I want to taste them when the Bastilla is opened.
Each layer has its own texture and purpose. Mixing everything may be quicker, but you lose part of what makes this version special to me.
How do I keep Bastilla crisp when reheating it?
I use the oven.
What I want to recover is not only warmth. I want the outside to become crisp again.
A microwave may warm the filling quickly, but it can soften the pastry. With an oven, I can bring the Bastilla back gradually and watch the warqa regain some of its crispness.
I stop when it is hot through, and the outside feels crisp again rather than giving it more time simply because a timer says so.
What is the difference between chicken Bastilla and seafood Bastilla?
They belong to the same Moroccan family, but I do not treat them as the same recipe with a different filling.
Chicken Bastilla combines chicken, onions, eggs, almonds, cinnamon, and a gentle sweetness you see here.
Seafood Bastilla takes a different direction, with seafood and a different balance of flavors.
For me, each deserves its own method.
What is the most important step in this Moroccan Bastilla recipe?
If I had to choose one, I would say control the moisture before you touch the warqa.
Watch the onions.
Listen to the pan.
Add the eggs patiently.
Let the filling cool.
Then respect the layers.
That is the part of Ilham’s method that stayed with me, and it is still the part I pay the most attention to when I make these Bastillas today.
From Ilham’s Table in Tangier to Your Kitchen
When I think back to those rare taxi trips to Tangier, I remember how much I looked forward to stopping at my cousin Ilham’s home and finding her individual chicken Bastillas on the table.
For a long time, I thought there must be something she was not telling me.
Maybe one special spice.
Maybe one ingredient that made her Bastillas different.
But when I kept asking her about it, the answer was much simpler. What she knew was a way of working, a savoir-faire she had learned from her mother.
And with time, I understood what she meant.
Watch the onions.
Listen to the pan.
Add the eggs patiently.
Let the filling cool.
Respect the layers.
None of these things sounds like a secret. But together, they change the Bastilla.
You hear that little crackle when the moisture has almost disappeared from the onions. You see each egg disappear into the mixture before adding the next. You wait until the filling is cool instead of rushing it into the warqa. And when you assemble the Bastilla, you let the onion and egg mixture, the chicken, and the almonds each keep their place.
Ilham learned this way of making Bastilla from her mother. Years later, it is the part of her recipe I most want to pass on.
That is what stays with me from those visits to Tangier.
Not a mysterious ingredient.
A sequence.
A few signs to watch for.
And the patience to let each stage finish before beginning the next.
If you make these individual Moroccan Bastillas, please tell me how the filling behaved in your kitchen. Did you hear that little crackle before adding the eggs? Leave me a comment below. I would be happy to hear how they turned out.
For another dish that has taught me a lot about patience, timing, and Moroccan home cooking, explore my authentic Moroccan tagine guide.
Moroccan Bastilla Recipe with Chicken and Almonds

Equipment
- 1 Large cooking pot with lid
- 1 Wooden spoon
- 1 Small deep plate, about 5 inches / 12–14 cm
- 1 Pastry brush
- 1 Baking tray
- 1 Parchment paper
- 1 Small sieve for decorating
Ingredients
Chicken and Onion Base
- 1 whole chicken about 3.3 lb / 1.5 kg, skin removed and cut into quarters
- 5 medium onions about 2.2 lb / 1 kg, finely chopped
- 100 ml vegetable oil about a scant 1/2 cup
- 1 teaspoon salt or to taste
- 1 teaspoon ground ginger
- 1 teaspoon ground turmeric
- 1 teaspoon white or black pepper
- 1 teaspoon ground cinnamon
- 3 – 4 saffron threads optional
- 2 mastic grains crushed with a little sugar, optional
- 1 teaspoon smen optional
- 4 tablespoons finely chopped parsley divided
- 100 ml water about a scant 1/2 cup
Onion and Egg Filling
- 6 large eggs
Almond Filling
- 400 g toasted almonds coarsely ground
- 3 tablespoons powdered sugar
- 1 teaspoon ground cinnamon
- 2 tablespoons orange blossom water
For Assembly
- 12 medium warqa sheets 2 per Bastilla
- 4 – 6 tablespoons melted butter as needed
- 2 – 3 egg yolks as needed for sealing
For Decorating
- Powdered sugar as needed, up to about 100 g
- 2 – 3 tablespoons ground cinnamon as needed
Instructions
1. Start the Chicken and Onions
- Place the vegetable oil, chicken pieces, finely chopped onions, about 1 tablespoon of the parsley, salt, ginger, turmeric, pepper, cinnamon, saffron, mastic, and smen in a large pot.
- Cook over medium heat for about 10 minutes, turning the chicken occasionally so it cooks with the onions and spices.
- Do not try to brown the chicken hard. The onions should simply begin to soften and the spices should become fragrant.
2. Add the Water and Cook the Chicken
- Pour in 100 ml water, about a scant 1/2 cup.
- Cover the pot, lower the heat, and cook gently for about 30–40 minutes.
- Pierce the thickest part of the chicken with a fork or the tip of a knife. The meat should feel tender and begin to loosen easily around the joints.
- Remove the chicken from the pot and leave it until cool enough to handle.
3. Reduce the Onion Mixture
- Add the remaining parsley to the onions left in the pot.
- Continue cooking over low heat, uncovered, until nearly all the free liquid has evaporated.
- Watch the mixture, but also listen.
- When the moisture is nearly gone, you should begin to hear a light crackling sound from the fat.
- That is the sign I look for before adding the eggs.
4. Add the Eggs One at a Time
- Add one egg to the reduced onion mixture and stir.
- Wait until the egg has completely disappeared into the onions before adding the next one.
- Continue in the same way with all 6 eggs.
- Cook until the mixture forms soft clumps and there is no watery pool at the bottom of the pot.
- Remove from the heat and let the onion-and-egg filling cool completely.
5. Shred the Chicken
- Remove the bones and any tough pieces from the cooked chicken.
- Shred or cut the meat into small pieces.
- Keep the chicken separate from the onion-and-egg filling.
6. Prepare the Almond Filling
- Combine the toasted coarsely ground almonds with:
- powdered sugar;
- cinnamon;
- orange blossom water.
- Mix well and keep this filling separate.
7. Prepare the Warqa
- Place one sheet of warqa over a small deep plate, about 12–14 cm / 5 inches in diameter, allowing the edges to hang over the sides.
- Lightly brush the warqa with melted butter.
8. Build the Three Layers
- Add the fillings in this order:
- onion-and-egg mixture;
- shredded chicken;
- almond mixture.
- Spread each layer gently before adding the next.
- Do not mix the three fillings together.
9. Fold and Seal
- Fold the hanging edges of the warqa toward the center, working around the Bastilla.
- Use a little egg yolk to seal the final folds.
- Place the folded Bastilla onto a second sheet of warqa and wrap it again to reinforce the shape.
- Turn and shape it gently into a compact round Bastilla.
- Brush the outside lightly with melted butter.
- Repeat with the remaining five Bastillas.
10. Bake
- Preheat the oven to 350°F / 180°C.
- Arrange the six Bastillas on a parchment-lined baking tray with a little space between them.
- Bake for about 20–25 minutes, or until the warqa is golden, crisp around the edges, and dry-looking on the surface.
- Do not rely only on the clock. If the pastry is still pale, give it a little more time.
11. Decorate and Serve
- Let the Bastillas rest for a few minutes after baking.
- Dust lightly with powdered sugar and finish each one with a simple cinnamon circle in the center.
- Serve warm while the warqa is crisp and the filling inside is still tender.
Notes
🧾 Nutrition approximative par 1 Bastilla individuelle
| Nutrient | Amount (Per Serving) |
|---|---|
| Calories | ≈ 1,170 kcal |
| Carbohydrates | ≈ 66 g |
| Total Fat | ≈ 76 g |
| Saturated Fat | ≈ 16 g |
| Protein | ≈ 59 g |
| Sodium | ≈ 750 mg |
| Cholesterol | ≈ 400 mg |
| Dietary Fiber | ≈ 12 g |
| Total Sugars | ≈ 24 g |
Nutrition note: Nutritional values are approximate and calculated per individual Bastilla. Actual values may vary depending on the amount of chicken recovered after deboning, the size and type of warqa or phyllo sheets, the amount of butter used during assembly, and the amount of powdered sugar used for finishing.
Cook Morocco With Me
Some recipes are written down. Others are learned by watching, listening, tasting, and asking questions at the right table. Join me for more Moroccan recipes and the small cooking lessons that come with them.
Come Cook With Me Beyond the Recipe
The finished plate is only part of the story.
On my social pages, I share the moments that do not always fit into a recipe article: the texture I look for in the pan, the way I fold a pastry, ingredients I use at home, new Moroccan dishes I am working on, and small lessons picked up from family, places, and years of cooking.
If Moroccan food is something you want to understand as well as cook, come join me there.
Follow along, save the dishes you want to try, and when you cook one of my recipes, send me a photo or tag me. I always enjoy seeing how Moroccan food takes shape in another kitchen.
Come find me on social media and keep cooking with me.
Tell Me How Your Bastilla Turned Out
If you made these individual Moroccan Bastillas, I would really like to know what happened in your kitchen.
Did you hear that little crackle from the onions before adding the eggs?
Did your filling stay dry enough for the warqa?
And when you cut the first Bastilla open, could you still see the three layers?
Leave me a comment below and tell me what worked, what surprised you, or where you had a question.
I read the comments because they often show me the small details that matter in a real home kitchen, and they may help the next person making the recipe too.
Tell me how your Bastilla turned out. I’d be happy to hear about it.